Sound Layering: Add Weight and Depth to Your Mixes
 3,5 / 5,0 |

Ever wondered how to stack instruments and vocals to thicken your mixes? We’re discussing some basic sound layering production techniques.
Table of Contents
Sound Layering
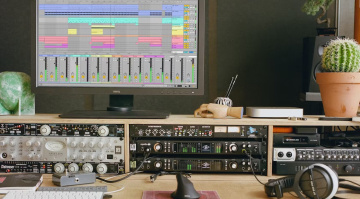
Whether you’re an artist, a producer, or a mix engineer, layering sounds is an essential part of the creation process in any style of music. From giving your mixes more dimension and texture to creating contrast between the different sections in your songs, let’s look at some ways to layer sounds in your productions.
Sound Layering: Drums
Although drums rarely need layering to stand out, there are some simple tricks you can use to get them to easily cut through dense mixes and increase the overall impact. Many different styles of music use a snare drum or clap on the second and fourth beats of the bar.
By layering a shaker or tambourine on top of these snare hits or claps, we can add to the overall texture and extend the high-frequency range of the sound. To get even more depth from our drum layering, we can stagger the timing ever so slightly dragging the shaker forward or backward on the grid to achieve a thicker overall sound.
Adding reverb to the shaker or tambourine hit is another technique to add a spatial dimension to the sound. Because the reverb is only on the shaker, it sits only in the high-frequencies without masking the snare. Finally, to tie everything together (including the reverb), you can assign all the channels to the same aux bus with a compressor to add cohesion.


Sound Layering: Synths
Layering synths is an effective way to get huge and dynamic-sounding mixes with loads of texture. Also, because the synth layers are playing octaves or harmonies of the main lead or bassline, each layer can become an innocuous part of the greater whole without becoming perceivably busy.
If your original sound used a square wave, try using a sawtooth or triangle for the next layer and transposing it a 4th, 5th, or octave up. Also, with each layer you add, be sure to experiment by using slightly different filter and envelope settings. To avoid stacking sounds in the exact same place within the stereo field, using panning or unison can create some space for the layers.
Depending on the character of your synth sound, you can also use modulation to add rhythmically pulsating textures that really give your layers the “wall of sound” character we love from so many of our favourite tracks. Each time you add a layer, be sure to listen to it critically both in context and muted, so you can make sure you’re adding a cohesive puzzle piece rather than making a mess.

Sound Layering: Vocals
Vocal layering is slightly more of a delicate process because you have to make sure you preserve the intelligibility of the vocals, so the lyrics can still be clearly heard. The best way to achieve this by far, is in the vocal booth. Artists like Eminem and Mariah Carey have mastered the art of overdubbing almost identical performances to thicken verses or for creating harmony stacks.
Another way to layer vocals is to create them manually in your DAW. You can do this with effects sends or by duplicating your main vocal track and then applying a pitch shift to transpose the new layer to create octave doubles or harmonies. Meanwhile, you can also use a vocoder to add a unique metallic texture to your vocal parts.
There is a wide world of vocal processing tools, ranging from corrective tools like Melodyne and vocal alignment plugins to creative layering tools like Harmony Engine. However, rather than going on a spending spree, you’re better off mastering vocal layering with the stock plugins in your DAW. This will make you a better producer, and when you acquire additional tools like Melodyne, try to use its corrective and creative capabilities fully and add them to your layering workflow.


Sound Layering: Guitars
As we discussed with vocals, the best way of layering guitars is through recording carefully written performances that are voiced so that they don’t clash with each other in terms of frequency range. While rhythm guitar parts are often doubled in modern productions, they tend to sound better when you’ve recorded the takes manually rather than duplicating them in your DAW.
The realms of hardware and software guitar processing present some amazing possibilities for layering guitars. Whether you choose to use amplifiers or simulation software, each of these avenues allows you to create a vast range of different tones and textures. Most guitarists will have either an octaver, a pitch shifter, or a harmonizer, in their pedal boards, so this is a great starting point.
Luckily, Logic Pro (and GarageBand) has excellent guitar processing capabilities within its Amp Designer and Pedalboard plugins, so you don’t need additional software to get started if you’re running a Mac. Also, modulation effects like phasers and flangers are very useful for getting wide colourful stereo sounds.

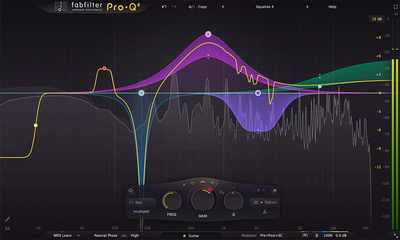
Sound Layering: EQ
No matter what type of instrument you’re trying to layer for thickness and weight, there are a few EQ techniques that can help you add to rather than overshadow the already existing sounds in your mix. Once you’ve used sound layering extensively in your projects, you’ll get to the stage where you start to hear the layers as ideas in your head.

In the process of creating the layers in your DAW, high and low shelving filters are your friends, because they can prevent adjacent sound layers from infringing on each other, by reducing high and low frequencies accordingly. Before you create each additional layer, consider whether its purpose is to add texture or harmonics to the sound.
By duplicating a synth sound, for instance, and then transposing it up an octave and removing the highs, you can allow only the note it’s playing to be heard above the original sound. Finally, once you’re happy with the layers you’ve added to a particular sound, assign all the outputs to the same bus so you can EQ and compress them as one cohesive sound (as we did with our drums).

More about Sound Layering:
- Thomann’s Guide to Plugins
- Learn about Music Production
*Note: This article contains promotional links that help us fund our site. Don’t worry: the price for you always stays the same! If you buy something through these links, we will receive a small commission. Thank you for your support!

This might also interest you