Jef’s Top Tips for making your Gibson Les Paul play like a dream, Part 1: Cleaning
Part One of my series on how to maintain your Gibson Les Paul
With all the negative news about Gibson recently, I thought it was about time I shared my top tips for getting your Gibson Les Paul to play like a dream. This week we’re looking at some basics like cleaning, intonation and restringing. Later in this series, we’ll be looking at some Les Paul modifications.
This week, I’m going to offer a few tips on setting up and cleaning a Gibson Les Paul. I own a few and like to keep them in good condition. Finding a good Les Paul can be a bit of a mission, so when you find yours, I suggest you follow these simple tips for keeping it in shape.
My suggestions this week do not involve any modifications or third party add-ons or upgrades, but you will need to invest in a few cleaning products and so I have linked to all my favourite ones that I use. These will not damage the nitrocellulose finish on your Les Paul. Of course, you can use these on any other guitars you own and so feel free to try them out on any of your guitars that have a similar construction.
Clean your axe!
When cleaning your guitar, the first step is to remove your old strings. Then you will need to get rid of any dirt, or finger gip, as I call it, using something that won’t damage your fretboard. I would suggest an old plectrum or piece of plastic about the thickness of a credit card. Use this carefully to scrape off any nastiness.
It’s time to clean the fretboard. One of my favourite cleaning products is Fret Doctor bore oil for cleaning and conditioning fretboards. It works wonders on rosewood and ebony boards. I put this on early in my set up, as I want it to work its way into the fretboard.
Get a small drop of the oil on your finger and work it across the whole fretboard. A small drop because less is more. My tiny little bottle of Fret Doctor has lasted 10 years and I reckon I have another two to three years left in it, so don’t slap it on, be stingy with it, as it only needs a very small amount to do its job.
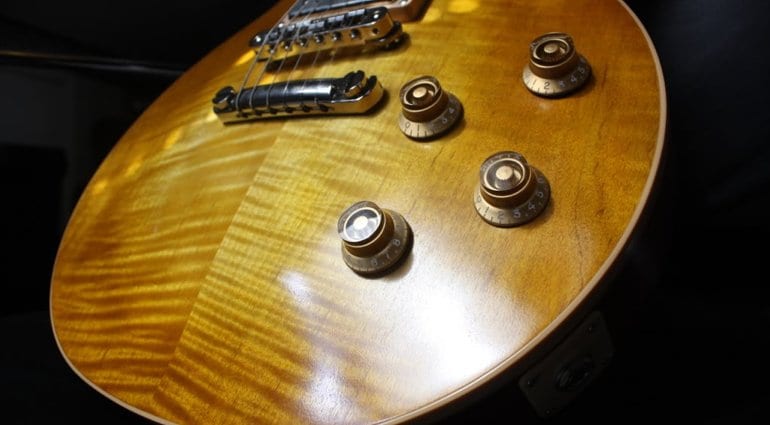
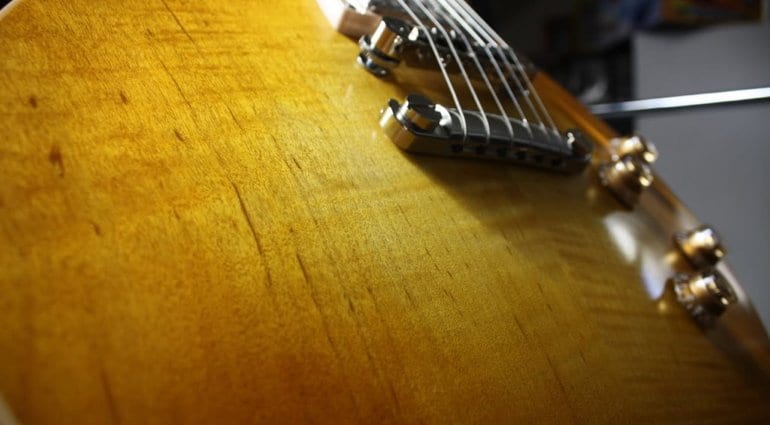
Now clean and polish the body and back of the neck. For this, I use a cleaning product that comes in two parts to clean and polish up the nitrocellulose finish on my Les Pauls. My favoured set of cleaners is made by a company called Virtuoso. They make a cleaner and a polish specifically for nitro finishes, and they work really well. Again, less is more with this stuff. You can see how it worked on the Les Paul HoneyBurst in the photo above. That guitar is a Les Paul Standard Faded model that I polished up using Virtuoso polish.
Fret Polishing
I always polish my frets after removing my strings. It feels so much better when you’re bending strings and sliding up and down the fretboard whilst playing. It’s easy to do. You can use a product called Miracle Cloth for this. It’s an impregnated yellow cloth that lets you remove any nasty dirt from your fretwork with ease. Some players use a cloth called Gorgomyte for this, but essentially they are the same thing.
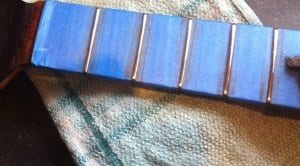
Mask your fretboard and then polish using 0000 wire wool, I do this to all my guitars including this EBMM JP7! · Source: Jef Stone/Gearnews
You must clean the frets afterwards using a clean dry cloth, as the residue from the Miracle Cloth should be completely removed to achieve the best results.
Another approach to cleaning frets is to use 0000 wire wool, like this. If you sue this method, you will need to mask the wood or you could damage it. I often use low tack masking tape to mask off the fretboard. I would also suggest that you tape over your pickups – if you don’t bits of wire wool will stick to the magnets and that is not a good look!
Off your nut
On my own Gibson guitars, I always remove the original Corian nut fitted at the Gibson factory, as I find that Corian is quite sticky. I have this replaced with a good quality bone nut. This might seem extravagant, but I find they stay in tune better and that the strings don’t stick as much as with bone as with Corian. I would suggest you pay a good guitar tech to do this job unless you have all the tools and experience to do it yourself.
To make the nut super slippery I use Big Bends Nut Sauce, which is a lubricant that you can apply to the nut and saddles of your bridge that helps alleviate friction. It comes in a handy applicator that’s a bit like a syringe, so it’s easy to apply.
Clean your pots
It is a very good idea to periodically clean any switches, contacts and potentiometers on your guitar, as they can get scratchy or noisy over time. To do this I always use Servisol Super 10 Switch Cleaner. I never use anything like WD40 as it is not the correct type of lubricant and will ruin your pots. A good quality switch cleaner will clean and lubricate your electrical contacts.
You will need to open your guitar’s control cavities and spray the cleaner into the little slot on the side of the potentiometer using the provided straw to get it in the contact area. As always, less is more and you should spray a little and then turn the pots fully each time in both directions. You should also spray a little onto the contacts of the pickup selector switch to keep it clean and lubricated as well. It’s also a good idea to spray a little on a guitar jack plug and insert it into your guitars output jack a few times to clean the contacts there as well.
Top Wrapping
It’s time to put some strings on. I suggest you use at least gauge 10 or above, as the shorter 24.75″ scale length of a Les Paul benefits from heavier gauge guitar strings. When I restring my Les Paul guitars, I like to ‘Top Wrap’ them. I find it makes them feel a bit slinkier and I also like the way it feels on my right hand as I rest it to palm mute when playing. Now, I don’t think it does anything tonally, although many argue that it does, but I do feel it helps with string tension as it makes less of a break angle from the stop tailpiece up to the ABR-1 or Nashville bridge.
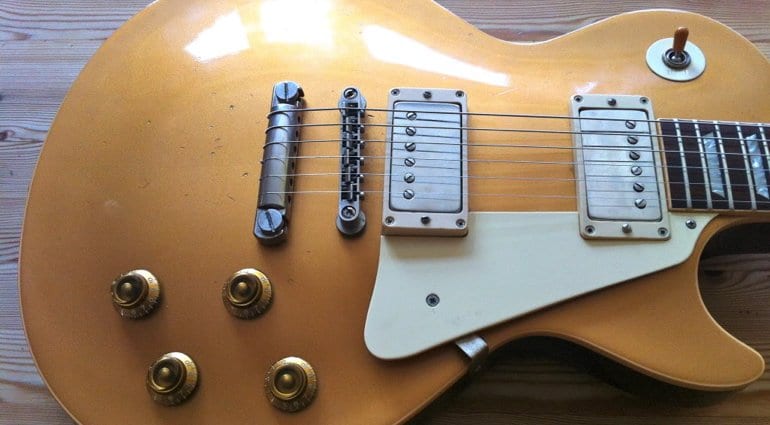
Top-wrapping involves feeding the strings backwards through the stop tailpiece and then back up and over the top of the tailpiece, then over the bridge. You can see a couple of my guitars below and this will show you how it should look when it is done.
- Top Wrapped Les Paul faded · Source: Jef Stone/Gearnews
- Gibson ’57 Gold Top top wrapped · Source: Jef Stone/Gearnews
String locking
When you pull your strings through the tuning peg/machine heads, I suggest that you pull them though, leave enough slack to allow you to ‘tune-up’ and keep the string under tension as you tune to pitch.
I do this by pulling on the string with my right hand, as I tune up the tuning peg with my left hand and by keeping the string taught I avoid any bad wraps around the tuning post. For me personally, I always pull the string up at a 90-degree angle through the tuning peg and wind so that I clamp the string with the wraps and lock it in place once it has been fully turned, again keeping the string taught as I wind it around the post.
You will, of course, need to stretch out the strings once you have them tuned to pitch, then repeat the process until they hold tuning.
Intonation
I would suggest you make yourself familiar with how to intonate a guitar, as this is vital for the guitar if you want it to be in tune with itself past the 12th fret on each string. You will need an electronic guitar tuner and the relevant tools for your bridge. I’ve added a little demonstration video from Elixir strings below to show you how it is done.
Video
You are currently viewing a placeholder content from YouTube. To access the actual content, click the button below. Please note that doing so will share data with third-party providers.
Next time: Modifications!
These are just a few basics. Next time, I’m going to cover some of my favourite modifications and hardware that I use on my own Les Paul guitars. If you found this article useful, then let me know. I would also love to hear any of your own personal set up tips as well, so please comment below if you have any I should be aware of. I love a good set up tip and have found most of my ones through trial and error or via good advice from other players and luthiers.
For more Gibson articles click here
 4,7 / 5,0 |