Beetlecrab Tempera Review: A Granular Sampler Like No Other
Checking out the Granular Performance Instrument
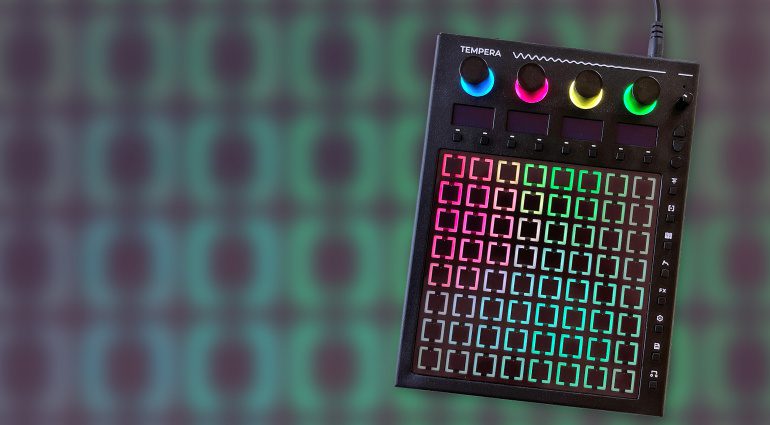
Tempera by Beetlecrab Audio is without a doubt one of the most unusual granular hardware instruments available today. The colorful touchpad full of pulsating emitters and grains can seem a bit intimidating at first. But once you get the hang of it, it’s a whole new way of performing with samples. Read our review to find out what Tempera is all about.
Table of Contents
Tempera: Quick Facts
- Granular sampler with 8 tracks and multitouch touchpad
- Emitters can be freely positioned on the sample canvas
- Emitters play grains from the underlying samples according to their settings
- Lots of modulators and effects
- Built-in microphone
- 8 GB of sample memory, expandable via microSD card and/or USB drive
- Can resample its own output
What is Tempera?
Let’s begin by trying to answer the question what Tempera actually is. The granular instrument was conceived by the same people who brought us the wonderful Vector Synth. In a nutshell, it’s a granular sampler with eight tracks. You can load up to eight samples simultaneously and then unleash Tempera’s granular engine to chop them up into tiny pieces (or longer slices) and put them back together again. The eight tracks correspond to the eight columns of the multi-touch capable touchpad.
A complete Tempera patch is called a “canvas” and contains the eight tracks with their respective samples, emitters, and settings.
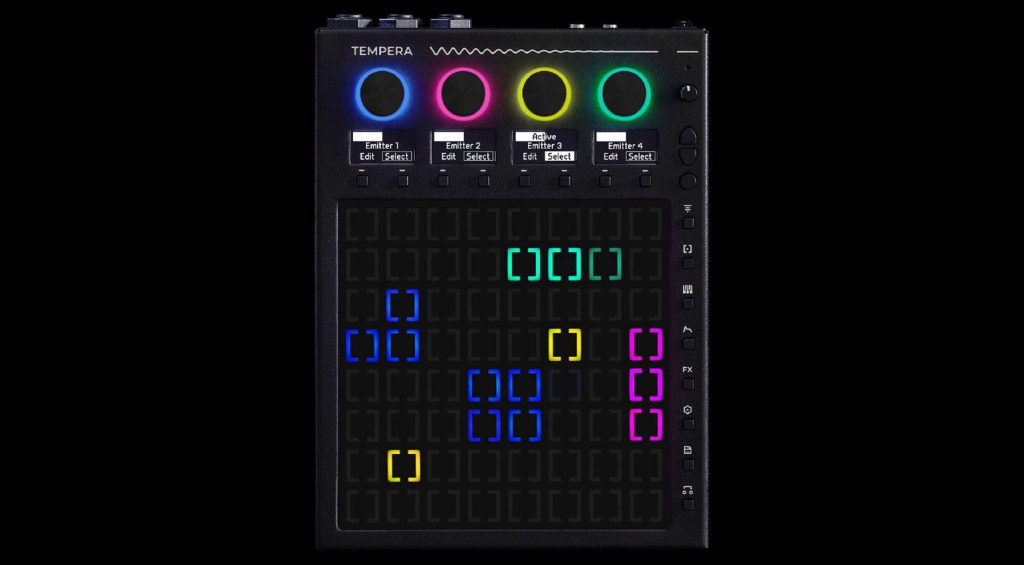
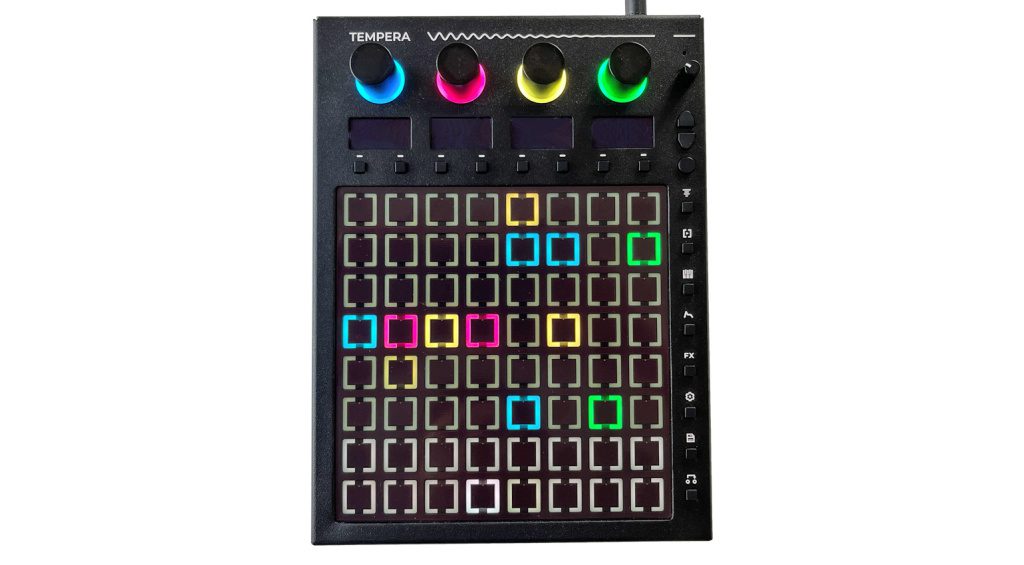
Using Tempera, you’ll mostly be dealing with the so-called emitters. For each canvas, you can define four emitter types, which are represented by four different colors. The default color scheme is blue, pink, yellow, and green, although the latest firmware lets you customize the colors if you wish. These emitters can be placed at any location on the canvas (don’t call it grid!).
Importantly, the same emitter type can be used multiple times. For example, you could place several blue emitters on the canvas. While all of these share the same settings, they’ll all sound different, as they’ll emit different grains depending on their location. If you want to go really crazy, you can even fill all 64 cells with emitters.
When you play a note (via MIDI or by bringing up the handy overlay keyboard on the touchpad), the emitters start to emit grains from the sample(s) below them. You could think of an emitter as a granular playhead that you can freely position and move around on the canvas. Move it to a different location and it’ll draw grains from a different position within the sample, or a different sample altogether. Depending on their settings, emitters can even play grains from multiple adjacent samples. That’s when it becomes clear that this is no ordinary granular sampler. We’ll take a closer look at the mysterious world of emitters in a moment.
Tempera: Hardware and Connectors
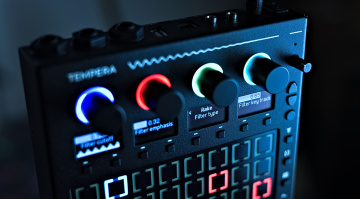
Tempera comes with an external power supply and a printed user manual. The hardware seems reassuringly solid. The sturdy metal chassis sits firmly on the table and doesn’t wobble or move around as you go wild on the touchpad. The four large rotary encoders feel great, as do the push buttons. I was relieved to find that the touchpad doesn’t seem particularly prone to fingerprints. If there’s one little complaint, the tiny volume knob seems a bit flimsy. It’s the one reason I wouldn’t feel comfortable tossing Tempera into a backpack without some sort of protective case.
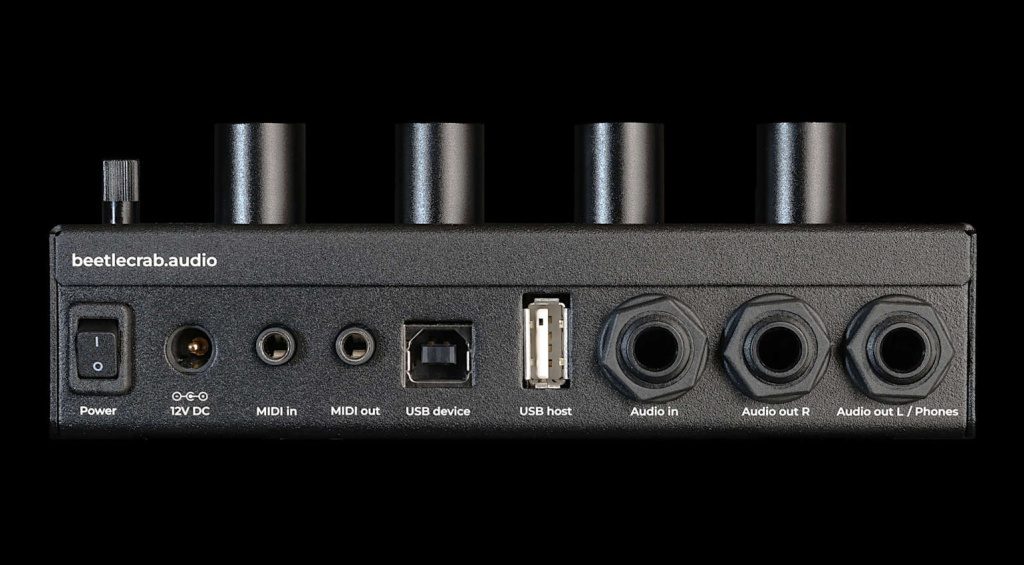
On the back, you’ll find a stereo output (2 x 1/4”) and a stereo input (1 x 1/4” TRS). The input is extremely versatile. You can connect pretty much anything to it – from stereo line-level signals to dynamic microphones to electric guitars and basses. Simply select the appropriate input type and gain level in the Settings menu.
Next are two USB connectors. One is for connecting Tempera to a computer (Device). The other (Host) allows you to connect a MIDI controller directly to Tempera. It can also be used for USB storage media. The 1/8” TRS connectors for MIDI in and out are compatible with both standards (A and B). The slot for a microSD card is located on the front side.
Firmware Updates
My review unit shipped with firmware version 1.5.1 installed. The first order of business was to update the firmware to version 2.0, which Beetlecrab Audio had released in the meantime. The current firmware is available for download from the manufacturer’s website. While you’re at it, make sure to get the updated manual, as well.
Updating the firmware is quick and easy. After downloading the file, simply save it to a microSD card or USB thumb drive and connect that to the Tempera. Then press and hold the round button while powering on the unit and follow the on-screen instructions.
Tempera: First Steps
After updating the firmware, the head-scratching began. How do I get sounds out of this thing? I normally like to approach new devices with a trial-and-error attitude. Many synths will tell you how they want to be used. With Tempera, that strategy clearly didn’t work. After tapping the touchpad and turning the knobs for a while without hearing anything, I realized that I was obviously doing it wrong.
To appreciate Tempera, you need at least a basic understanding of how the tracks, samples and emitters interact. I highly recommend reading the manual, which is on point and not overly technical. Of course, you could also watch some of the excellent tutorials on YouTube.
Thankfully, the manual doesn’t begin with the usual technical gibberish, but instead takes you through a mini tutorial that teaches you in a few simple steps how to make the first sounds. Just what I needed! What I heard was already very promising.
I then proceeded to play around with some of the included preset canvases. An impressive array of sounds opened up. Multi-layered textures full of surprises, percussive cascades, intricate rhythms, microtonal sequences. My first impression was that you could easily score a science fiction movie or deep sea documentary using only the included presets.
Of course, the next step was to find out what Tempera could do to my own samples. So I imported a bunch of samples I know very well, thinking that this would make it easier to comprehend what the emitters were actually doing.
Tempera: Importing and Recording Samples
Tempera can import samples via USB storage media or a microSD card. With the USB bridge mode added in the 2.0 update, you can access Tempera’s microSD card directly from your computer over USB as an external storage device. This makes transferring samples back and forth much easier. The internal memory holds 8 gigabytes. Tempera imports most commonly used audio file formats. Internally, samples are saved in the lossless FLAC format, which helps maximize the amount of samples that fit into memory.
Moreover, you can easily record your own samples via the audio input or the built-in microphone. The tiny microphone may not be the pinnacle of audio fidelity, but it invites you to record everything around you and turn it into something exciting. Resampling the audio output is also possible – with or without FX. Excellent!
To record a sample, choose the desired input in the Settings menu and adjust the input level and recording threshold. Then select the track to record onto and arm it for recording. As soon as the input level hits the threshold, the recording begins. When you’re done, quickly trim the start and end points and the new sample is immediately ready for use on the selected track.
The maximum sample length per track is around 11 seconds. While you can import longer samples, you’ll need to specify which portion of the sample you want to use in this case.
Tracks and Emitters
Tempera makes sounds using emitters that extract and play grains from the tracks and samples underneath them. To hear a sound, two conditions must be met. Firstly, you must play a MIDI note, either by using an external controller or sequencer or by bringing up the overlay keyboard on the touchpad. Secondly, one or more emitters must be placed on the canvas. This is indicated by cells lighting up in the color of the respective emitter type.
The vertical position of an emitter on a track corresponds to the position within the sample. An emitter placed at the top will play back grains from the beginning of the sample, while an emitter halfway down the canvas will draw grains from somewhere in the middle of the sample.
You can lock emitters to specific locations and save them with the canvas, so they’ll be there the next time you load it. Depending on the emitter mode, however, it is also possible to create emitters on the fly using your fingers (even multiple emitters at once), and move them around the touchpad. In practice, I often found the combination of both to be the most satisfying. A bunch of predefined emitters creates a basic sound that you can then modify expressively by controlling emitters with your fingers. More often than not, the resulting sonic collages will keep you busy for hours.
The emitters are highly customizable. In the Emitter menu, you’ll find the typical parameters of a granular synth: grain size and density, grain envelope, grain pitch, and so on. Each emitter also offers a combined lowpass and highpass filter. This is where you specify the amount and length of the grains an emitter will play, as well as their timing and sound.
It gets really interesting when you get to the Spray and Offset parameters, both of which are available for the X and Y axes separately. These determine the size and position of the canvas area from which an emitter extracts grains. The unique thing about Tempera is that you can not only specify a section of a single sample (Y axis), but also to the left and right (X axis). In other words: With enough X-Spray, an emitter will not only draw grains from the track on which it was placed, but also from adjacent tracks. A single emitter can therefore play grains from several samples. It goes without saying that this opens up a world of creative possibilities.
The creation and playback of grains can also be synced to an internal or external clock signal. Combine this with the corresponding grain length setting and you can do things like “reorganize” drum loops while maintaining a coherent timing. Beat slicing may be pushing the limits of traditional granular synthesis – at least it isn’t what comes to my mind when I think of a granular synth. But then, what’s traditional about Tempera?
Modulators and Effects
If this sounds wild, it’s about to get even better when you realize that the emitter parameters are almost infinitely modulateable. Per voice, you can unleash no less than ten modulators (as of firmware 2.0), each of which can be an LFO or envelope. Of course, MIDI velocity and aftertouch are also available as modulation sources.
In addition to grain length, density, pitch, and so on, you can modulate the aforementioned Spray and Offset parameters. For example, you could set up a couple of LFOs to make an emitter move in a circular motion around the canvas, playing back grains from the bottom left at one moment and from the top right at the next. Or you could have emitters expand and contract, like inflating and deflating bellows of grains. This can of course also be clock-synced. Techniques like this can quickly turn any sample into a pulsating, expressive collage. How Tempera interweaves multiple samples into something completely new and unexpected isn’t just extremely unique, it’s often mindblowing.
The included effects are the icing on the cake. In addition to a per-voice multimode filter, there are global chorus, delay, and reverb effects. The per-emitter FX sends introduced with the 2.0 update greatly expand the creative possibilities with the effects. Sending specific emitters through the delay or reverb while others remain dry can add another layer of complexity and depth to a canvas.
Conclusion: What is Tempera – and what is it not?
If you’re still with me, chances are that you can’t wait to explore this sonic playground yourself. Or you might be wondering if Tempera fits your workflow and how much you can really benefit from it. And to be honest, I’m not entirely sure how to answer that question for myself. I don’t think Tempera is for everyone.
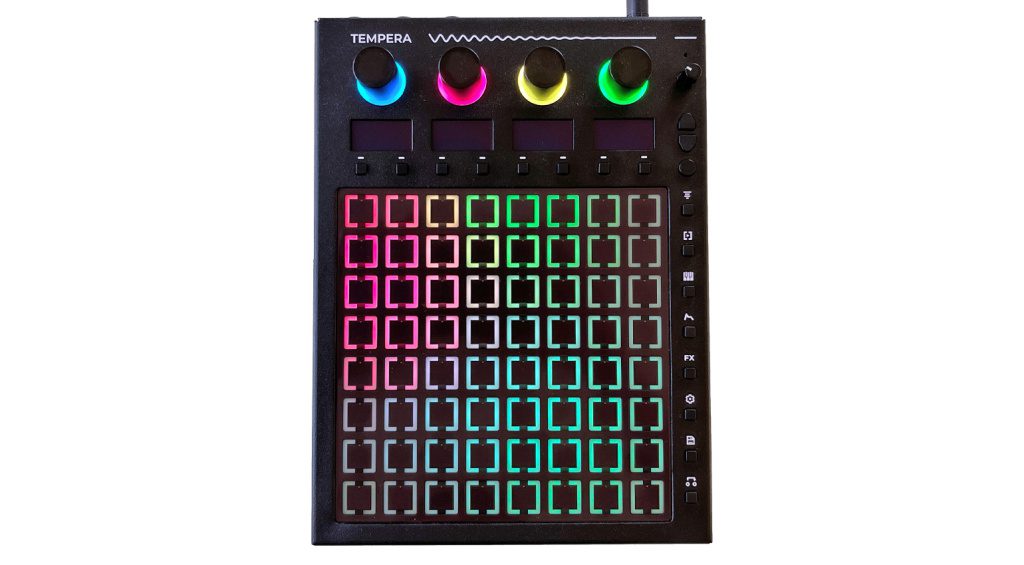
On the one hand, it is extremely inspiring and truly a completely new way of performing with samples. The granular emitters reshuffle everything so thoroughly that it’s almost impossible not to come up with something interesting. The large touchpad really feels like an empty canvas on which you can paint an endless string of sonic collages.
On the other hand, there’s no denying that Tempera is a bit nerdy. I wouldn’t call it “intuitive”, as in “easy to use”. It isn’t an instrument that you can throw a bunch of samples into and quickly make the sound or beat you have in mind. Unlocking its full potential takes some time and involves a bit more thinking than I normally like to do when making music.
But I believe that working off of specific ideas really isn’t what Tempera is about. This is an instrument that invites you to break away from all habits and open up to something new. Not only can it turn a simple sample into whole spectrum of unusual timbres. Once you learn to appreciate its weirdness, it’ll surprise you with an endless string of sounds, rhythms, and textures you simply wouldn’t come across any other way. And it’s these moments of surprise and disbelief that can be the sparks that inspire new tracks. These moments are, in my opinion, the best thing about Beetlecrab Tempera.
Price and Availability
Beetlecrab Tempera is available exclusively from the manufacturer for €670 plus VAT.
Beetlecrab Tempera: Pros and Cons
Pros
- New and extremely inspiring way of performing with samples
- Large multitouch surface for positioning emitters with your fingers
- Easy sample import and sampling
- Comprehensive modulation capabilities and effects
- Built-in microphone
- Versatile connectivity
- Solid build quality
- Regular firmware updates
Contra
- Steep learning curve to unlock full potential

 4,6 / 5,0 |