Understanding Parallel Compression for Beginners
Add another dimension to your mixes.
 5,0 / 5,0 |

We dive into parallel compression, a powerful but often misunderstood audio process that can be applied in mixing and mastering workflows.
Parallel compression is a simple but effective technique that can be applied in mixing and mastering. Because it’s slightly less obvious in its final presentation, the process can often be misunderstood.
- Not to be confused with Sidechain Compression
As a processing technique, you can use it on individual channels or groups such as drums, guitars, vocals, and your mix bus, of course. However, there are a few fundamental principles to understand before we start using parallel compression in our DAWs.
Parallel Compression:
What is Parallel Compression?
In simple terms, using a compressor in parallel means splitting the dry input signal and blending it with the wet processed signal. As the entirety of the signal is not being compressed, the effect is more subtle and there are more variables to consider.

In the era of magnetic tape recording, noise reduction systems were essential technological developments. The Dolby A noise reduction system introduced in 1965 used a parallel compression bus to improve the signal-to-noise ratio.
This form of upward compression could bring the softer sounds within any signal into focus while taming the very loudest peaks simultaneously. Initially, the obvious application was in Classical music recording, so you could get the best results when mastering to vinyl.
Later, the technique became known as New York compression, as it became particularly popular with recording and mixing engineers in the city. As engineers of the time often made use of sub-mixes when working on mixing consoles, the technique caught on fast.


Using Parallel Compression In-line?
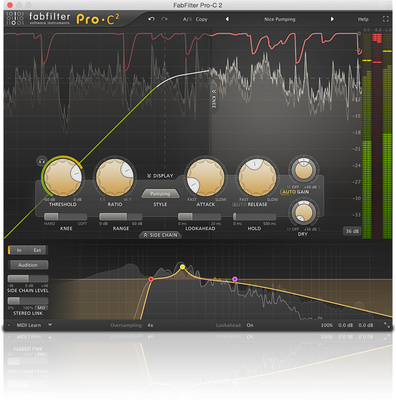
The majority of compressor plug-ins available today have a mix control on the control panel. However, this modern shortcut doesn’t help beginners who are trying to understand the process and where to apply it effectively in a DAW workflow.
Using compression with this method requires a bit of foresight. As you are blending your wet and dry signals in the end, start with your mix set at 100% so there is no confusion. Furthermore, because there will always be an element of the original signal present, try setting the compressor to react more aggressively than you normally would.
For example, if you’re working with drums, try getting the compressor to pump and bring up the levels of the reverb and cymbal decays within the sound. It might sound completely unusable at first, but now adjust the wet/dry mix to 25%.
Now, before we go any further, there is an important aspect to investigate involving the volume balance between wet and dry and the placement of makeup gain control in the circuit. Dan Worrall explains in the following video:


The Volume Balancing Issue
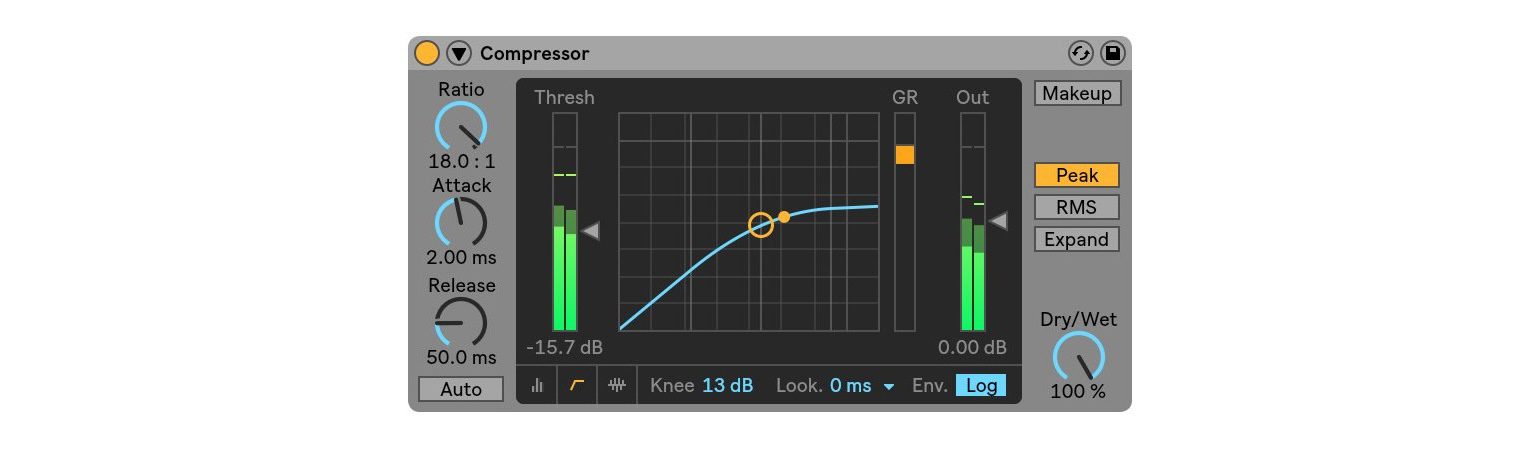
When it comes to compressors with wet/dry mix controls there is a crucial factor that affects the accuracy of the process. Is the mix control placed before or after the makeup gain? Therefore, if the makeup gain changes the dry input signal, this is in fact a design flaw that requires a workaround.
In order to do parallel compression accurately, the volume of our wet and dry signals needs to be roughly identical. Otherwise, our decision-making process will be affected by loudness bias, and the wet/dry mix percentage shown will not be true.
If you can’t boost or cut the wet signal without affecting the dry signal on your chosen compressor plug-in, you’ll have to do the parallel processing on a send, which we’ll cover next.
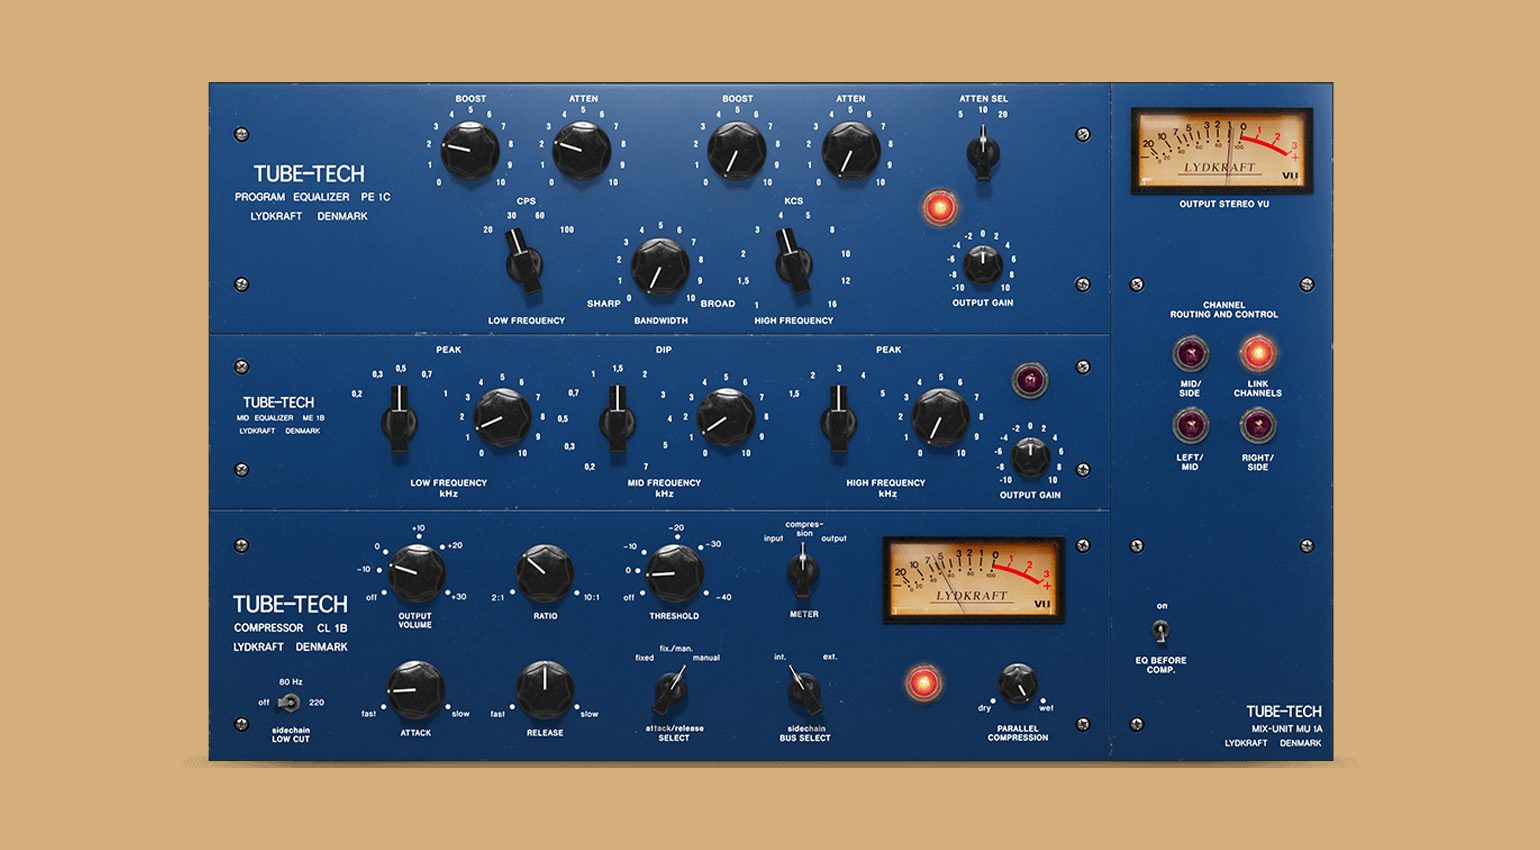
On the other hand, if the plug-in you’re using has its makeup gain control placed correctly like the Softube Tube-Tech CL 1B, for example, you can use the output gain, bypass switch, output panel, and wet/dry mix settings of 0% and 100% to balance the levels.
- Building a Hip-Hop Vocal Chain


Using Parallel Compression on an Aux Send
With this method, we’re using separate channel routing to split and blend our signals. Therefore, any compressor plug-in with its wet/dry mix set to 100% (if it has one) will do the trick.

Start by sending your dry signal to the aux channel at unity gain and opening a compressor as an insert on this aux channel. Now, use the fader of the aux channel and the compressor’s bypass switch to balance the wet and dry volumes.
Furthermore, if you’d like to do extra processing on your parallel signals together you’ll need to assign the outputs of the dry signal and the parallel aux channel to another aux bus. Now you can insert plug-ins on the bus to your heart’s delight.
If you need to automate your faders at any stage, ensure that your aux send is set to pre-fader. This means that any fader adjustments will not affect the signal level being sent to the parallel compression channel.


Using EQ to Target Your Parallel Compressor
You may be wondering where exactly you’d need to use parallel compression. Although it’s more effective on channel groups such as drums, guitars, and backing vocals, you can also use it to draw more attention to the nuances of your lead vocal during quieter verses.
Also, by placing an EQ before your compressor, you can focus on a specific frequency range:
- Is the midrange sounding a bit lackluster? Create a “frowning” EQ curve
- Need more low-end punch? Use a low-pass filter at around 600 Hz
- More smack to your transients? Using a high-pass filter at around 800 Hz or higher
Always keep in mind that you are introducing additional gain into your mix, so don’t overdo it. By looking at where the original signal is lacking, it can help us to decide which part of the frequency range to use.


More about Parallel Compression:
- Sidechain Compression
- Mastering Plug-ins for Beginners
- Thomann’s Guide to Compressors
*Note: This article about parallel compression contains affiliate links that help us fund our site. Don’t worry: the price for you always stays the same! If you buy something through these links, we will receive a small commission. Thank you for your support!


This might also interest you


One response to “Understanding Parallel Compression for Beginners”

How in the heck can you have an article about parallel compression without using the word ‘average’ or referring to RMS.